
How To Customize Your Welding Hood
When two or more pieces are melted together during manufacturing, the connection is formed as the components cool under the effect of heat, compression, or even both. The most common materials for welding are metals and plastic. However, wood can also be utilized. A weldment is a term used to describe the finished welded connection.
There are many risks associated with the welding environment. To prevent infrared rays, UV light, dirt, flames, and extreme heat from damaging their body, workers must keep their eyes, hair, and skin covered. Along with other skin and facial injuries, welding can lead to a disease known as photokeratitis, which is a burn to the eye. Due to these risks, welding safety equipment is crucial and required.
You could use more shielding than just welding safety eyewear for the majority of welding tasks. For cutting, polishing, or brazing, safety goggles are advised. They provide only basic safety against flames, light, dust, and occasional impact. Helmets and welding hoods provide more effective security, but each has a specific use. Read along to learn more about welding hoods and how to customize your welding helmet.
The Process of Welding
Fusion of Metals
Welding is an excessive heat procedure that dissolves the base material, аѕ compared to brazing and soldering, which do not, usually with the use of a filler substance. Intense temperature creates a molten metal pool during welding, which then chills to form a connection that may be sturdier than the main metal. In addition to temperature, a force can also be applied alone or in combination with it to create a weld. In order to prevent contamination or oxidation of the molten and filler metals, it is also possible to use a shielding gas.
Fusion of Plastics
Prior to applying heat or pressure, the areas must first be primed, and then the materials must cool so that fusion can occur. Based on the particular procedure employed, joining techniques for plastics can be divided into exterior and internal heating techniques.
Fusion of Wood
The elements are joined by heat produced by movement in wood welding. Prior to a linear friction motion that generates heat to bind the workpieces firmly, the materials that need to be connected are put under a lot of pressure. This quick method enables wood to be bonded in a matter of a few seconds without the need for glue or nails.
The Welding Hood
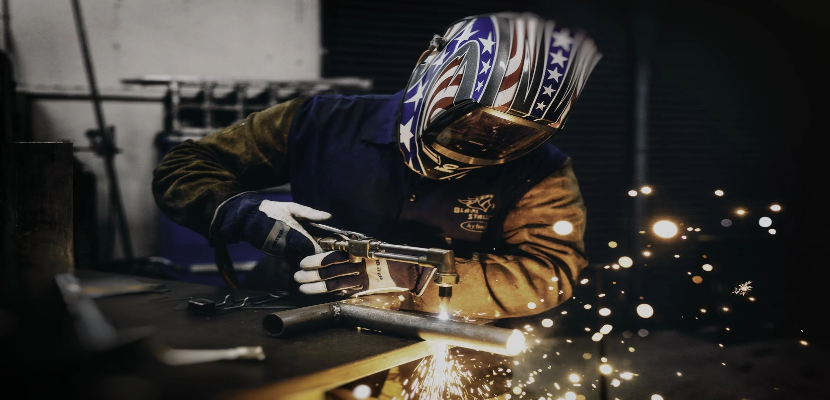
Among the most important protective gear welders need is a welding helmet, often known as a “hood.” In addition to strong sparks, a proper hood can shield the skin and eyes from the arc’s sometimes blinding infrared and ultraviolet radiation.
Welding helmets allow users to add a unique touch to their welder gear since it is amongst the most noticeable safety apparel items. With all that in mind, various colors and designs are offered for modern welding hoods. The protective capabilities of a hood, together with comfort factors, are what welders should consider when choosing the best helmet for their purposes even though these cosmetic characteristics attract attention. For a complete day of work, a welding helmet must be lightweight, balanced, and allow for adjustability while shielding the wearer’s face and eyes from flames, debris, and damaging light rays.
The functionality of hoods today is significantly higher than it was a decade ago. They are made to meet the unique requirements of welders on any assignment. All must adhere to high safety requirements worldwide, even the cheapest ones.
For individuals that do not need something particularly impressive from their PPE but yet need to be protected from welder risks, welding hoods are the perfect option. They are among the most popular kinds of welding safety available, and for valid reasons, are dependable and effective. Effortless pieces of equipment with permanent shading and passive protective lens are welder hoods. The hood can flip upward or downward so that you can always glance at your task without having to take off all of your protective gear, and the glasses are coated to guard against UV light emissions.
Important Factors To Take Into Account When Selecting A Welding Helmet
1. Do I Require A Lens With A Single Standard Shade Or A Changeable Shade?
Conventional welding hoods, often known as passive welding hoods, have seeing lenses with fixed UV and IR filters. Regardless of how much amps the light emits from the weld, this filter provides the very same level of security. Whenever a welder is prepared to work, he will have to quickly snap his neck or nod to turn the welding helmet down while holding the flame in place. The welder must elevate the welding helmet after work is finished to see.
Standard hoods with fitted lenses have various disadvantages despite frequently being affordable. After securing the welders hood, it could take a little practice for a novice welder to maintain the flame steadily and in the proper position. There might not be room to move around or slide a hood up or down if you’re welding in a limited place. The additional time required to raise and drop a hood can affect your efficiency.
2. How About Changing the Speed?
Once welding starts, a lens quickly changes from its normal condition to a color 3 or 4, and this speed is typically stated in rates. An initial switching speed may result in visual fatigue by the end of the day because your work involves welding over several hours at a stretch. If so, think about selecting a welding hood with an intermediary or expert-level switching speed.
3. Solar Energy, Batteries, or Both?
Auto-darkening hoods come in a wide range of power configurations. Some have solar assistance panels and, inside, non-changeable batteries. Some solar-powered devices have removable batteries. Some companies provide lithium batteries that are excellent for improved battery life but generally less available than AAA batteries. And lithium batteries are more expensive. Before they could be used, certain hoods with solar assist panels need to charge in full sunlight. The choice is likely subjective, but pick AAA battery powered for its widespread availability and low cost of battery replacement. Lithium batteries have a longer lifespan.
4. How Important Is Helmet Weight?
Yes. With prolonged usage, a lightweight welding hood will lessen neck stress and fatigue. The heaviness of the helmet you choose will mostly rely on how long you intend to use it daily and how all other criteria are combined. A welding hood should be as lightweight as possible given your budget if welding is your main job.
5. Where does Individual Preference Come in?
All welding hoods are made to shield users from the UV and infrared radiation that welding arcs can release. Nevertheless, there are lots of choices available. The first thing to consider is whether you’ll be using the hood for a variety of tasks or just one particular one.
Cost, weight, seeing lens, and other factors come into play in addition. Most importantly, pick a hood that you could wear comfortably for a lengthy period of time, if necessary. The extra effort spent finding the ideal fit can increase output and improve the caliber of welds.
If you’re taking welding training, it’s possible that some of your classmates may be sporting custom welding helmets. Some people might have painted comical figures, flowers, and skulls on their hoods.
You can customize your welding helmet today to make it look more stylish and attention-grabbing, as many welding hoods come in dark gray and gloomy black. Do you wish to give impressive welding helmet makeovers? The issue remains when you choose to decorate your custom welding helmets: how to go about doing it?
Steps To Customize Your Welding Hood
Step 1: Make Your Design Decisions First
Have an idea in your head before you begin painting your hood. For example, be sure you’ve got shades if you want to color a dragon on your hood. Get some templates if you’re unsure about how to design it yourself.
Step 2: Gather Items
Prior to starting, gather the necessary supplies:
- A welding mask
- An anti-fire primer
- A protective paint coat that is transparent
- A brush
- Your favorite hue of fire-resistant paint in a can or bottle
Fire-resistant paint and primer are required. There is a higher risk and possibility of your welding helmet catching fire if you are not utilizing fire-retardant materials.
Step 3: Remove the Lens and the Headpieces
You might hear from certain folks that you don’t need to remove the headwear and lens. The majority of welders who paint their hoods just tape off the headpiece and lens and start painting. Paint and primer can readily infiltrate your helmet and lens, especially if you have a good seal with the tape. One way to avoid this unpleasant situation is to remove the headpiece and lens before you begin to color and prime. You shouldn’t worry because it’s not as difficult as it might seem.
If you try removing some headwear and lenses from the welding hood, they will often come out. It’s quick, simple, and won’t damage your welding helmet. If you’re unsure of how to remove your helmet’s headpiece and lens, consult the directions.
You wouldn’t like to risk damaging your welding helmet because each one is unique. Put away these two things if you have separated them. They ought to be kept away from paints and primers. Of course, you might not want to accidentally spray paint on your headpiece or your lenses because it could damage them.
Step 4: Substitute Your Hood
If you’re prepared to start painting, start by giving your welding helmet an undercoat. There are only a few simple steps. If it’s been a while since you cleaned your welding helmet, do it now.
Your hood will be in the best shape possible as a result. Your welding hood may be cleaned in under 10 minutes. Just remove all the dust and dirt with a soft, rigid brush. Next, use some water and a delicate cloth to wipe your hood.
Take a brush or disc and start brushing along the front of the hood to the back as quickly as it has completely dried off. Any extra dust or debris that might adhere to your welding hood will be removed.
This step helps remove any polish or gloss that might be already present on your welding hood. Apply a fire-resistant primer to your hood after thoroughly washing it. Although some people argue that a primer is unnecessary, it ensures that your hood is in excellent shape, prolonging the paint’s lifespan.
Step 5: Spray Your Hood with Paint
You’ve finally arrived at the most exciting stage of painting your welding hood: the paint job!
Spray a lucid coat first to your welding hood. The layer can be neutral, like white, to make it easier to apply your chosen color. Spray the other color when the coat has had time to desiccate.
When you’re all set to give your hood a paint job of your chosen color, simply dip your paintbrush into the color and spread it out evenly and delicately. It’s imperative to be cautious when painting your welding hood, regardless of the type of paint chosen.
Step 6: Allow it to Dry Up
After the paint job, make sure to give your hood’s paint enough time to desiccate. It will ensure that the color has adhered properly to the material. In this technique, adding a top coat for extra shine is perfectly alright. And with that, your custom helmet is ready!
Types of Welding Hoods based on Function
Passive hoods and auto-dark hoods are the two main types of welding helmets. Essentially, these two primary kinds form the basis for all other types.
Passive Welding Hoods
The most popular and frequently used welding hoods are passive hoods. These helmets are praised for their enormous variety of forms, patterns, and sturdy construction. An excellent passive hood will provide a reliable defense against glaring sunlight, UV and IR radiation, sparks, gasses, and flying items. Now let’s examine the two types of passive helmets:
Hoods for Fixed Shade Welding
Fixed-shade passive welding hoods have a single-shade lens built into the helmet, as the name implies. The drawback is that you will need to continuously nod the hood down and up as the arc begins and ends, despite the fact that it does offer a wide viewing region and is quite economical. Additionally, it’s not the best helmet for tasks involving plasma slicing or crushing.
Adjustable Lens Helmet That Flips Up
With this type of helmet, you simply have to move the upper lid down and up rather than the complete shell, greatly reducing head strain. You can inspect your weld or perform grinding without having to move the shell whenever you lift up the panel since the lens beneath stays in place to give you ordinary visibility.
Helmets for passive welding have the following benefits:
- Passive welding hoods are incredibly durable materials that can last many years.
- The least expensive welding hoods are available.
- Suitable for chopping and polishing tasks as well as medium amperage welding operations.
- Ideal for experts and do-it-yourselfers who don’t want to keep fiddling with lens response or sensitivity levels to acquire reliable protection.
- Low cost of replacing the lens.
The best equipment is available in auto-darkening welding helmets, which are equipped with Auto-Darkening Filter (ADF) lenses. The hood’s glass automatically changes the visibility level whenever the arc is activated.
It removes the need to continuously move the welding helmets or flick the lid up or down. Despite the exorbitant price tag of these hoods, they are worthwhile if you often work on various welding jobs and substances, from straightforward repairs to heavy-duty, elevated arc welding.
Helmets with fixed shades
Such an auto-darkening welding helmet combines the ease of auto-darkening with the affordability of permanent shade hoods into a single product. Whenever it recognizes lighting from the arc in this situation, the ADF filter will fade to just a single shade.
When the arc ends, it’ll return to normal eyesight. A constant shade auto-darkening helmet will work perfectly if you just undertake fixed-amp welding tasks with a single type of material.
Welding helmets with adjustable shade.
On the other hand, if you operate in an industrial situation where you must weld various materials using various welding procedures, a permanent shade lens might be inconvenient. A changeable shade lens features two to four arc sensors activated when an arc is hit and changes the level of darkness depending on the arc type.
Auto darkening welding helmet that may be managed electronically and physically. Welding helmets with manual controls are more prevalent and often less costly than those with digital controls. The former’s color, intensity, and delay time can typically be changed using a knob.
Conclusion
Perhaps, after learning how to customize a welding helmet, you have acquired the knowledge you sought. By following the above-mentioned steps, you can accomplish it with ease. Grab your paintbrush and welder hood, and start customizing it right away! It’ll no longer be difficult to customize your welding hood.